10 DIY Home Improvements To Do When You Are Bored
Feeling bored and looking for productive ways to pass the time? Dive into these 10 DIY home improvement projects that not only curb your boredom but also enhance the beauty and functionality of your home and garden. Here’s a detailed guide to help you get started.
1. Raised Garden Beds
Why Build Raised Garden Beds?
Raised garden beds offer numerous benefits:
• Improved Drainage: Raised beds allow excess water to drain away more easily, preventing waterlogged soil and root rot.
• Reduced Soil Compaction: By keeping foot traffic out of the planting area, soil remains loose and aerated, promoting better root growth.
• Ease of Access: Raised beds reduce the need to bend over, making gardening more comfortable for your back and knees.
• Organised Appearance: Raised beds provide a neat, organised look to your garden, often enhancing its aesthetic appeal.
• Extended Growing Season: The soil in raised beds warms up more quickly in the spring and stays warmer later in the autumn, extending your growing season.
How to Build Raised Garden Beds:
Materials Needed:
• Wooden planks (cedar or redwood are great options due to their resistance to decay)
• Screws
• Drill
• Tape measure
• Saw (hand saw or circular saw)
• Carpenter’s square
• Level
• Soil
• Plants
Steps:
1. Planning and Measuring:
• Decide on the size and location of your raised bed. Common dimensions are 4 feet wide (for easy access from all sides) and 8-12 feet long. The height can vary, but 12-18 inches is typical.
• Measure the area where the bed will be placed to ensure it fits well in your garden layout.
2. Cutting the Wood:
• Measure and mark the wooden planks according to your desired dimensions.
• Use a saw to cut the planks to size. For a typical 4×8 foot bed, you will need two 4-foot planks and two 8-foot planks.
3. Assembling the Frame:
• Arrange the planks on a flat surface to form a rectangle.
• Use a carpenter’s square to ensure the corners are at right angles.
• Drill pilot holes at each corner where the planks meet to prevent the wood from splitting.
• Secure the planks together with screws at each corner, using at least two screws per corner for stability.
4. Preparing the Site:
• Choose a sunny location for your raised bed.
• Clear the area of any grass, weeds, or debris.
• Level the ground where the bed will sit to ensure even soil distribution and prevent water from pooling in low spots.
5. Placing the Frame:
• Position the assembled frame in your chosen location.
• Use a level to ensure the frame is even. Adjust as necessary by adding or removing soil underneath the frame.
6. Filling the Bed:
• Line the bottom of the bed with landscape fabric to prevent weeds from growing up into your raised bed. Ensure proper drainage by adding a layer of coarse gravel or small stones if your soil is heavy clay.
• Fill the frame with a mixture of high-quality garden soil, compost, and any necessary soil amendments. A common ratio is 60% topsoil, 30% compost, and 10% other amendments such as sand or perlite for drainage.
7. Planting:
• Once the bed is filled with soil, you can start planting. Choose vegetables, herbs, or flowers that suit your climate and growing conditions.
• Plant seeds or seedlings according to the recommended spacing and depth for each type of plant.
8. Maintenance:
• Water your raised bed regularly, keeping the soil consistently moist but not waterlogged.
• Mulch around plants to retain moisture and suppress weeds.
• Fertilise as needed based on the requirements of the plants you are growing.
By following these detailed steps, you can build a functional and attractive raised garden bed that will enhance your gardening experience and yield a bountiful harvest.
2. Vertical Garden
Why Create a Vertical Garden?
Vertical gardens are perfect for small spaces and add a lush, green backdrop to any area. They offer several benefits:
• Maximise Space: Ideal for small gardens, balconies, or indoor areas, vertical gardens allow you to grow more plants in less space by utilising vertical surfaces.
• Aesthetic Appeal: They can transform a blank wall into a vibrant, living art piece, enhancing the visual appeal of your surroundings.
• Improved Air Quality: Vertical gardens can improve air quality by absorbing pollutants and releasing oxygen.
• Insulation and Cooling: They provide natural insulation for buildings, reducing heating and cooling costs and creating a cooler microclimate.
• Ease of Access: Vertical gardens make it easier to care for plants, reducing the need to bend or kneel.
How to Create a Vertical Garden:
Materials Needed:
• Wooden pallets, wall planters, or vertical garden systems
• Soil
• Plants (herbs, succulents, flowers, etc.)
• Mounting hardware (screws, brackets, anchors)
• Landscape fabric (optional)
• Drill
• Level
Steps:
1. Choosing the Location:
• Select a sturdy wall that receives appropriate sunlight for the plants you intend to grow. Consider both indoor and outdoor options.
• Ensure the wall can support the weight of the garden, including the soil and plants.
2. Selecting and Preparing Your Vertical Garden Structure:
• Decide whether you will use wooden pallets, wall-mounted planters, or a specialised vertical garden system.
• If using wooden pallets, choose ones that are clean and free from chemicals. Sand them to remove any rough edges and splinters.
• Line the back and sides of the pallet with landscape fabric to hold the soil in place while allowing water to drain.
3. Mounting the Structure:
• Use a drill to attach mounting hardware to the wall. Ensure the hardware is securely fastened and can support the weight of the garden.
• If using wall planters, install them according to the manufacturer’s instructions, ensuring they are level and evenly spaced.
• For wooden pallets, secure the pallet to the wall using heavy-duty brackets or screws. Make sure it is level and stable.
4. Filling with Soil:
• Fill the planters or pallet sections with a high-quality potting mix suitable for the plants you have chosen. Ensure the soil is evenly distributed and not compacted.
5. Planting:
• Choose a variety of plants that suit your location’s light conditions and climate. Consider herbs, succulents, flowers, or even small vegetables.
• Plant the tallest plants at the top and the shorter ones at the bottom to ensure all plants receive adequate light.
• Space the plants appropriately to allow for growth and ensure good air circulation.
6. Watering and Maintenance:
• Water the vertical garden regularly, ensuring the soil stays moist but not waterlogged. Vertical gardens may require more frequent watering due to better drainage.
• Prune and trim plants as needed to maintain their shape and health.
• Fertilise periodically based on the needs of your plants.
• Inspect the structure and mounting hardware regularly to ensure stability and safety.
By following these detailed steps, you can create a beautiful and functional vertical garden that enhances your space and provides a lush, green environment.
3. Compost Bin
Why Build a Compost Bin?
Building a compost bin is an eco-friendly way to recycle kitchen scraps and yard waste into nutrient-rich compost for your garden. Here are the benefits:
• Waste Reduction: Composting significantly reduces the amount of kitchen and garden waste that would otherwise go to landfills.
• Free Fertiliser: The compost produced is a natural and cost-effective fertiliser that enriches the soil, improving plant growth.
• Environmental Impact: Composting helps reduce greenhouse gas emissions from decomposing organic matter in landfills.
• Soil Health: Compost improves soil structure, enhances moisture retention, and promotes beneficial microbial activity.
How to Build a Compost Bin:
Materials Needed:
• Wooden pallets or plastic bins
• Screws
• Drill
• Compostable materials (kitchen scraps, yard waste)
• Hinges and latch (optional, for lid)
• Shovel or pitchfork (for turning compost)
• Landscape fabric (optional, for base)
Steps:
1. Choosing the Location:
• Select a convenient and shaded spot in your garden that is easily accessible.
• Ensure the location has good drainage to prevent waterlogging.
2. Selecting and Preparing Materials:
• Decide whether to use wooden pallets or plastic bins. Wooden pallets are cost-effective and provide good ventilation, while plastic bins can be more durable.
• If using wooden pallets, ensure they are clean and untreated to avoid chemicals leaching into the compost.
3. Assembling the Compost Bin:
• Wooden Pallet Bin:
• Use four pallets to form the sides of the bin. Stand them up and arrange them in a square or rectangular shape.
• Drill pilot holes and secure the pallets together at the corners with screws.
• If desired, attach a fifth pallet on top as a lid, using hinges and a latch to make it easy to open and close.
• Plastic Bin:
• Drill several holes in the sides and bottom of the bin to ensure proper ventilation and drainage.
• If the bin does not have a lid, create one using a piece of wood or plastic, attaching it with hinges for easy access.
4. Placing the Compost Bin:
• Place the assembled bin in your chosen location.
• If desired, line the bottom of the bin with landscape fabric to improve drainage and prevent pests from burrowing in.
5. Adding Compostable Materials:
• Start by adding a layer of coarse materials like small branches or straw to improve aeration and drainage.
• Add kitchen scraps (fruit and vegetable peels, coffee grounds, eggshells) and yard waste (grass clippings, leaves, small branches) in alternating layers to balance green and brown materials.
• Avoid adding meat, dairy, oils, or diseased plants, as they can attract pests and cause odour issues.
6. Maintaining the Compost:
• Regularly turn the compost pile with a shovel or pitchfork to aerate it and speed up decomposition. Aim to turn the pile every 1-2 weeks.
• Keep the compost moist but not waterlogged. It should feel like a damp sponge.
• Monitor the temperature of the compost. A healthy compost pile will heat up as materials decompose.
7. Harvesting the Compost:
• After a few months, the compost will be dark, crumbly, and earthy-smelling.
• Harvest the finished compost by sifting it through a screen or simply removing it from the bottom of the bin.
• Use the compost to enrich your garden soil, add to potted plants, or as a top dressing for your lawn.
By following these detailed steps, you can build a functional compost bin that will help reduce waste and provide nutrient-rich compost for your garden, promoting a healthier and more sustainable gardening practice.
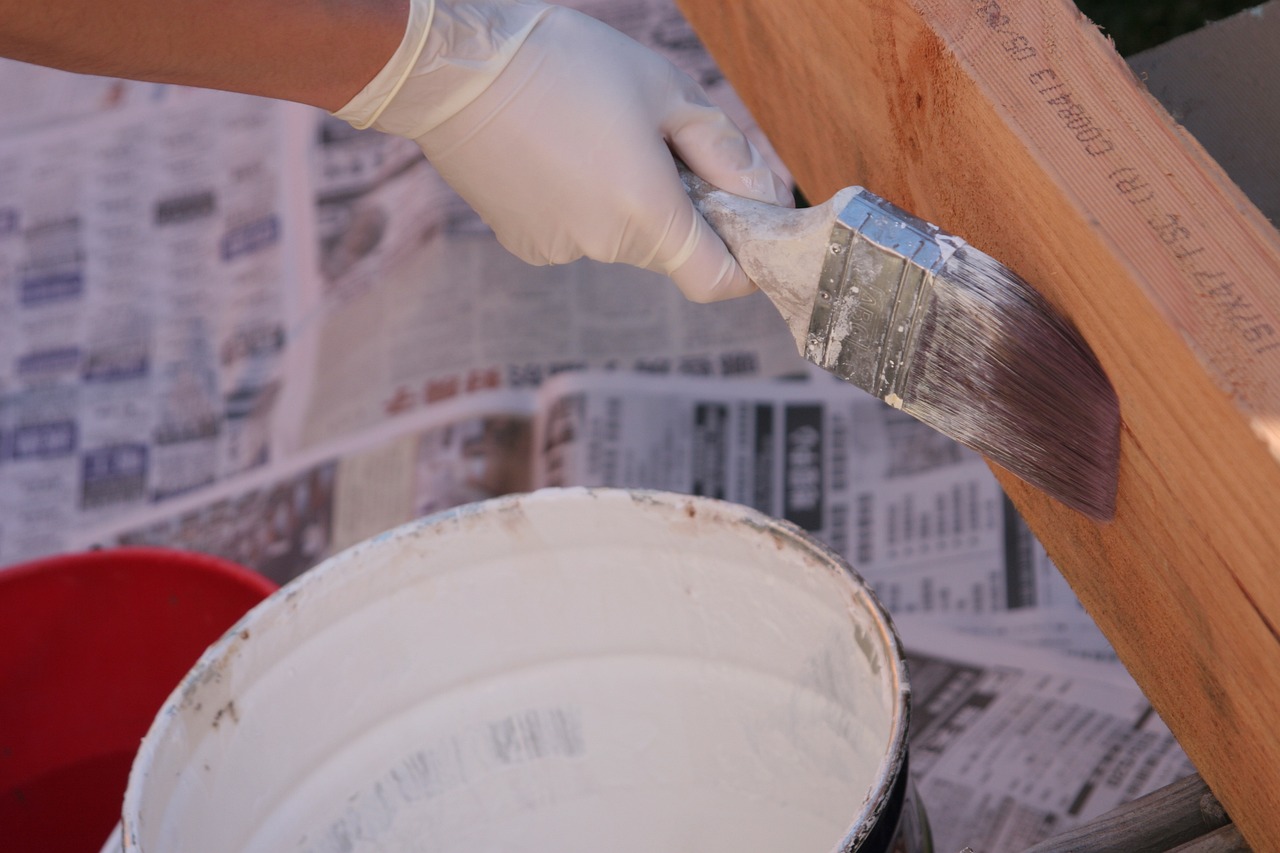
4. Outdoor Furniture
Creating your own outdoor furniture is a fulfilling way to spend your time, especially when you’re bored. It offers several advantages:
• Customisation: You can design and build furniture that perfectly fits your style and needs, ensuring it complements your outdoor space.
• Cost-Effective: DIY furniture projects are often more affordable than purchasing pre-made pieces, especially when using reclaimed or inexpensive materials.
• Personal Satisfaction: Building your own furniture provides a sense of accomplishment and allows you to develop new skills.
• Durability: By selecting quality materials and construction methods, you can ensure your furniture is durable and long-lasting.
How to Build Outdoor Furniture:
Materials Needed:
• Pallets or reclaimed wood
• Screws
• Drill
• Sandpaper (various grits)
• Paint or stain
• Paintbrushes or rollers
• Wood glue (optional)
• Measuring tape
• Saw (hand saw or circular saw)
• Carpenter’s square
• Clamps (optional)
Steps:
1. Designing Your Furniture Piece:
• Decide on the type of furniture you want to build (e.g., bench, table, chairs).
• Sketch a design with dimensions to guide your construction.
• Consider ergonomics and functionality in your design to ensure comfort and usability.
2. Preparing the Wood:
• Measure and mark the wood according to your design.
• Use a saw to cut the wood to the required sizes. Ensure all cuts are straight and accurate.
• If using pallets, disassemble them carefully to salvage the wood planks. Remove any nails or staples.
3. Assembling the Furniture:
• Arrange the cut wood pieces according to your design.
• Use a carpenter’s square to ensure corners are at right angles.
• Drill pilot holes to prevent the wood from splitting when driving in screws.
• Apply wood glue to joints for added strength (optional).
• Secure the pieces together using screws and a drill. Clamps can help hold pieces in place while you work.
Example for a Simple Bench:
• Cut four legs to the desired height.
• Cut two long pieces for the seat and two shorter pieces for the width.
• Attach the shorter pieces to the legs to form the sides.
• Secure the longer pieces on top to form the seat.
4. Sanding the Surfaces:
• Use coarse-grit sandpaper to remove rough edges and splinters.
• Progress to finer grits to smooth the surfaces. Ensure all surfaces are even and comfortable to touch.
• Pay special attention to areas where people will sit or place their hands.
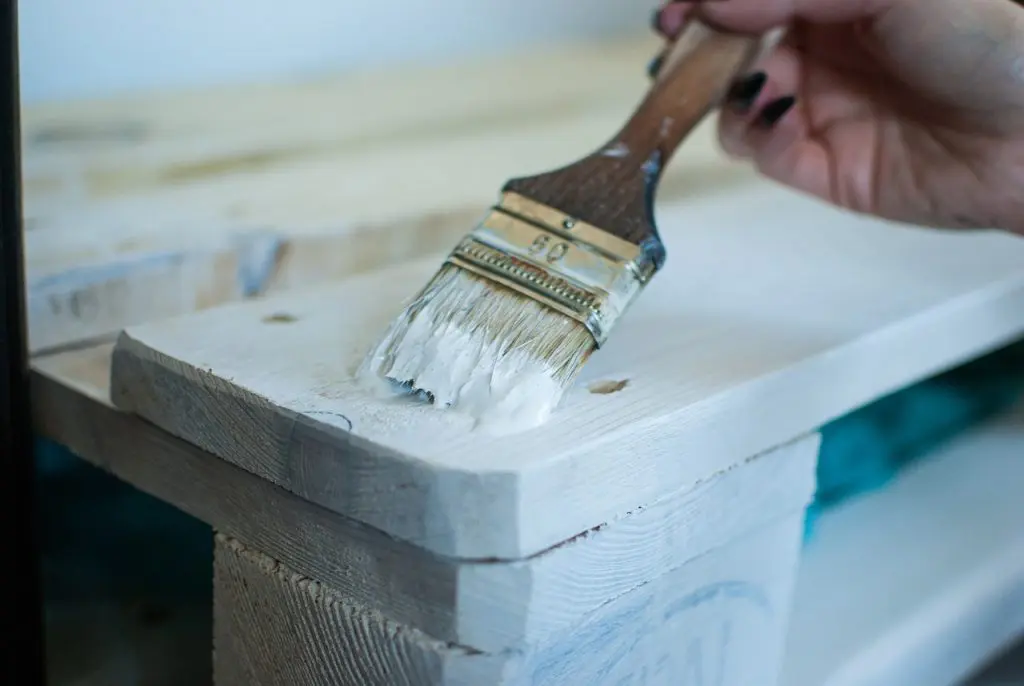
5. Painting or Staining:
• Choose a paint or stain suitable for outdoor use to protect the wood from the elements.
• Apply a primer if necessary, followed by the paint or stain.
• Use brushes or rollers to apply an even coat. Follow the manufacturer’s instructions for drying times and the number of coats needed.
• Consider applying a clear sealer for additional protection.
6. Final Touches:
• Allow the paint or stain to fully dry and cure before using the furniture.
• Inspect the furniture for any loose screws or rough spots and make any necessary adjustments.
• Place the furniture in your desired outdoor location and enjoy your new creation.
By following these detailed steps, you can build custom outdoor furniture that enhances your outdoor living space and provides a rewarding project to occupy your time.
5. Garden Pathway
Why Install a Garden Pathway?
A well-designed garden pathway offers several benefits:
• Structure and Organisation: It defines the layout of your garden, creating a clear and organised space.
• Improved Accessibility: Pathways make it easier to navigate your garden, especially during wet or muddy conditions.
• Enhanced Aesthetic Appeal: A beautiful pathway can significantly enhance the overall look of your garden, adding visual interest and charm.
• Reduction in Soil Erosion: Pathways help manage foot traffic, reducing soil compaction and erosion.

How to Install a Garden Pathway:
Materials Needed:
• Stepping stones, bricks, or gravel
• Shovel
• Landscape fabric
• Garden hose or string (for marking)
• Tape measure
• Level
• Wheelbarrow (optional, for moving materials)
• Rake
Steps:
1. Planning the Pathway Layout:
• Decide on the path’s route, considering the natural flow of movement through your garden.
• Use a garden hose or string to mark the edges of the pathway, ensuring it is the desired shape and width.
• Measure the length and width of the pathway to determine the amount of materials needed.
2. Preparing the Pathway:
• Use a shovel to dig out the marked pathway to a depth of about 10-15 cm (4-6 inches). This depth allows for a base layer, landscape fabric, and the top layer of stones, bricks, or gravel.
• Remove any grass, roots, or debris from the dug-out area to ensure a smooth base.
3. Laying Down Landscape Fabric:
• Roll out landscape fabric along the entire length of the pathway. This helps prevent weed growth, ensuring your path stays neat and low-maintenance.
• Cut the fabric to fit the width of the path, overlapping edges by at least 10 cm (4 inches) to prevent gaps where weeds could grow.
• Secure the fabric in place with landscape staples or by tucking the edges into the soil.
4. Placing the Stepping Stones or Bricks:
• Stepping Stones:
• Arrange the stepping stones on the landscape fabric, spacing them evenly. Use a level to ensure each stone is flat and stable.
• Press each stone into the ground slightly to secure it. If needed, add or remove soil underneath to achieve a level surface.
• Bricks:
• Lay the bricks in your desired pattern, such as a running bond or herringbone.
• Use a level to ensure the bricks are even, adjusting the soil underneath as necessary.
• Gravel Path:
• Fill the pathway with gravel, spreading it evenly with a rake. Aim for a depth of 5-10 cm (2-4 inches).
• Use a level to ensure the gravel is evenly distributed and provides a smooth walking surface.
5. Finishing Touches:
• Tamp down the stepping stones, bricks, or gravel to compact them slightly, ensuring stability.
• Add edging materials if desired to keep the pathway neat and prevent the stones or gravel from spreading into the garden beds.
• Sweep or rinse off any excess dirt or debris from the surface of the pathway.
By following these detailed steps, you can install a beautiful and functional garden pathway that enhances the structure and accessibility of your outdoor space, providing a rewarding project to enjoy.
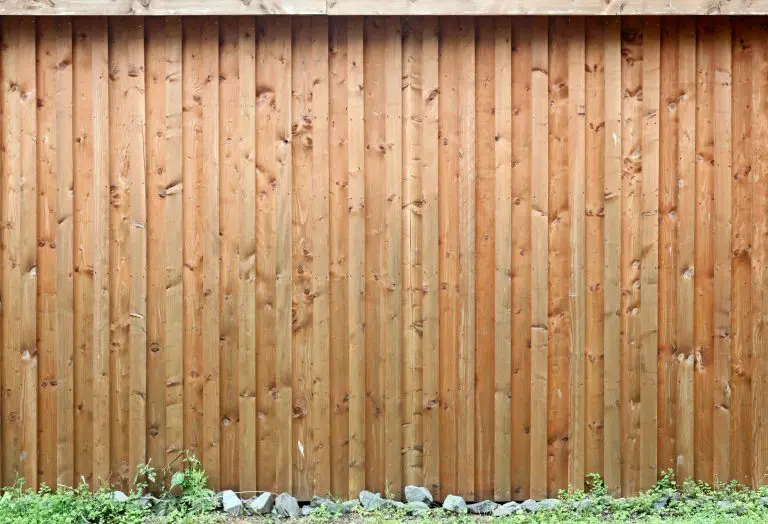
6. Window Box Planters
Why Use Window Box Planters?
Window box planters offer several benefits that can enhance your home’s exterior:
• Charming Aesthetics: They add a touch of charm and elegance, making your home more visually appealing.
• Space-Saving Gardening: Ideal for small spaces, they allow you to grow herbs, flowers, or small vegetables without needing a large garden.
• Indoor-Outdoor Enjoyment: You can enjoy the beauty and fragrance of your plants from both inside and outside your home.
• Easy Access: Conveniently located, they make it easy to water, prune, and harvest your plants.
How to Construct Window Box Planters:
Materials Needed:
• Wooden boards (cedar or redwood recommended for durability)
• Screws
• Drill
• Measuring tape
• Saw (hand saw or circular saw)
• Sandpaper
• Brackets for mounting
• Soil
• Plants (herbs, flowers, small vegetables)
Steps:
1. Measuring and Cutting the Wooden Boards:
• Measure the width of your window to determine the length of the window box.
• Decide on the depth and height of the box, typically around 15-20 cm (6-8 inches) for both dimensions.
• Cut the wooden boards to size: one bottom piece, two side pieces, and two end pieces.
2. Assembling the Box:
• Arrange the cut pieces on a flat surface.
• Drill pilot holes to prevent the wood from splitting when inserting screws.
• Attach the side pieces to the bottom piece using screws, ensuring they are aligned properly.
• Secure the end pieces to the sides and bottom, forming a rectangular box.
• Sand all edges and surfaces to remove splinters and rough areas.
3. Attaching Brackets for Mounting:
• Choose sturdy brackets that can support the weight of the filled window box.
• Attach the brackets to the bottom of the box using screws. Make sure they are evenly spaced and aligned.
• If necessary, drill additional drainage holes in the bottom of the box to prevent waterlogging.
4. Mounting the Window Box:
• Determine the mounting location below your window, ensuring it is level.
• Secure the brackets to the exterior wall using appropriate screws and anchors for your wall type (brick, wood, etc.).
• Ensure the window box is securely attached and level before filling it with soil.
5. Filling with Soil and Planting:
• Add a layer of gravel or small stones at the bottom of the box for improved drainage.
• Fill the box with high-quality potting soil, leaving a few centimetres of space at the top.
• Plant your chosen herbs, flowers, or small vegetables, arranging them as desired.
• Water the plants thoroughly after planting.
Maintenance Tips:
• Watering: Regularly water your window box, especially during hot and dry periods. Ensure the soil stays moist but not waterlogged.
• Fertilising: Use a balanced fertiliser periodically to promote healthy plant growth.
• Pruning: Trim and deadhead plants as needed to encourage new growth and maintain a tidy appearance.
• Seasonal Care: Refresh the soil and replant seasonally to keep your window box looking vibrant year-round.
By following these detailed steps, you can construct beautiful and functional window box planters that enhance your home’s exterior and provide a delightful gardening experience.
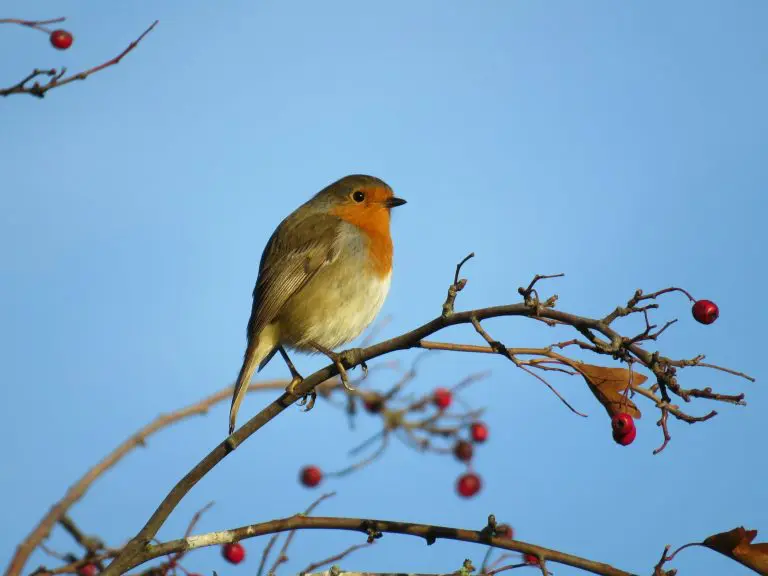
7. Birdhouse or Bird Feeder
Why Build a Birdhouse or Bird Feeder?
Creating a birdhouse or bird feeder offers numerous benefits:
• Support Local Wildlife: Provides shelter and food for birds, contributing to local biodiversity.
• Natural Observation: Allows you to observe and enjoy bird activity in your garden.
• Educational: Offers a hands-on project that can teach about bird species and their habits.
• Garden Enhancement: Adds a delightful natural element to your outdoor space, making it more lively and vibrant.
How to Build a Birdhouse or Bird Feeder:
Materials Needed:
• Wooden planks (cedar or pine are good options)
• Screws
• Drill
• Saw (hand saw or circular saw)
• Sandpaper
• Paint (non-toxic) or wood stain
• Birdseed
• Mounting hardware (hooks, brackets, or poles)
• Measuring tape
• Pencil
Steps:
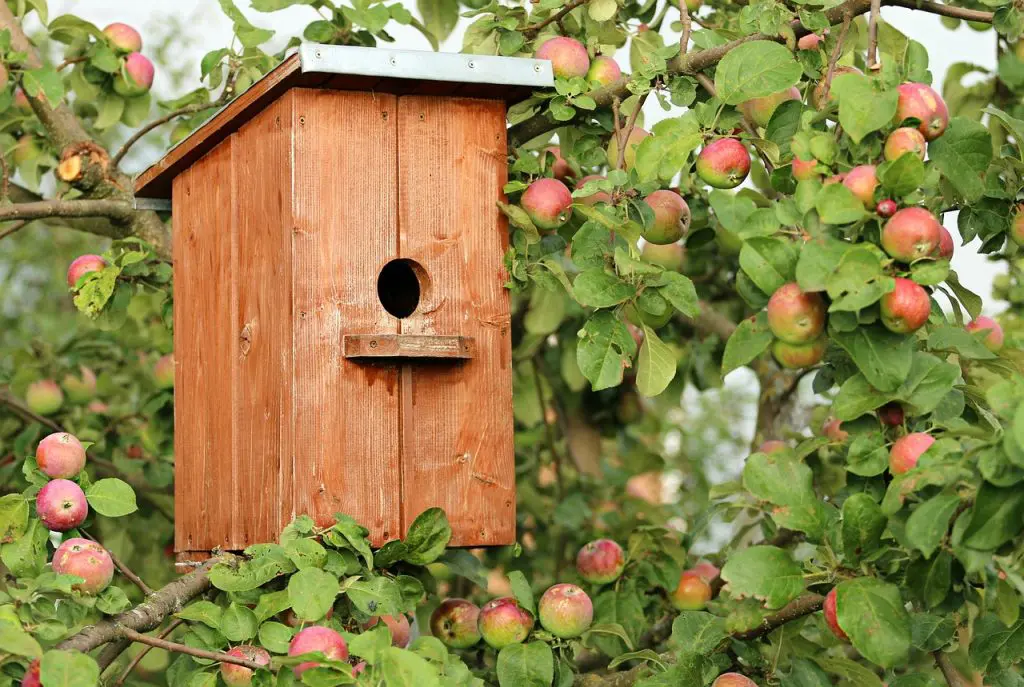
1. Designing the Birdhouse or Feeder:
• Birdhouse: Consider the type of birds you want to attract. Design with appropriate dimensions and entrance hole size for the species.
• Bird Feeder: Decide on the style (platform, tube, hopper, or suet feeder) and ensure it suits the types of birds in your area.
• Sketch your design, including dimensions and a plan for assembly.
2. Cutting and Preparing the Wood:
• Measure and mark the wooden planks according to your design.
• Use a saw to cut the pieces to the required sizes. Common pieces for a birdhouse include the base, sides, roof, and front/back panels. For a feeder, you may need a base, sides, and a roof or cover.
• Sand all cut edges and surfaces to remove splinters and rough spots.
3. Assembling the Birdhouse or Feeder:
• Arrange the wooden pieces on a flat surface.
• Drill pilot holes to prevent the wood from splitting when inserting screws.
• Assemble the base and sides first, securing them with screws.
• Attach the front and back panels for a birdhouse or the remaining sides for a feeder.
• Attach the roof, ensuring it overhangs slightly to protect from rain.
• For feeders, consider adding a perch or landing area.
4. Painting or Decorating:
• Use non-toxic paint or wood stain to decorate your birdhouse or feeder. Avoid bright colours that might deter birds.
• Apply a weather-resistant finish to protect the wood from the elements.
• Allow the paint or stain to dry completely before proceeding.
5. Mounting and Filling:
• Birdhouse: Mount on a post or tree at a suitable height and location to protect from predators and harsh weather. Use brackets or screws to secure it firmly.
• Bird Feeder: Hang from a tree branch, hook, or mount on a pole in a safe and visible location. Ensure it is easy to access for refilling and cleaning.
• Fill the bird feeder with birdseed suitable for the types of birds you want to attract.
Maintenance Tips:
• Cleaning: Regularly clean the birdhouse or feeder to prevent the spread of disease. Use mild soap and water, and rinse thoroughly.
• Refilling: Keep the feeder stocked with fresh birdseed, especially during winter months when food is scarce.
• Inspection: Check the birdhouse or feeder periodically for any damage or wear, and make necessary repairs to keep it safe for birds.
By following these detailed steps, you can build a functional and attractive birdhouse or bird feeder that supports local wildlife and brings the beauty of birds to your garden.
8. DIY Pergola or Trellis
Why Install a Pergola or Trellis?
Pergolas and trellises offer several benefits for your garden:
• Support for Climbing Plants: They provide a structure for vines and climbing plants to grow, adding lush greenery and flowers to your garden.
• Create Shaded, Cosy Spaces: Pergolas create a shaded area perfect for relaxing or dining outdoors.
• Add Height and Visual Interest: These structures add architectural interest and verticality, enhancing the overall aesthetic of your garden.
How to Build a Pergola or Trellis:
Materials Needed:
• Wooden beams (cedar or treated lumber recommended)
• Screws or bolts
• Drill
• Post hole digger
• Concrete mix
• Measuring tape
• Saw (hand saw or circular saw)
• Level
• Climbing plants (e.g., clematis, wisteria, roses)
Steps:
1. Planning the Size and Location:
• Decide on the size and location of your pergola or trellis. Consider the purpose (e.g., shading a seating area, creating a focal point) and the space available.
• Measure the area and sketch a design with dimensions.
2. Preparing the Post Holes:
• Mark the locations for the posts according to your plan. Ensure they are evenly spaced.
• Use a post hole digger to dig holes for the posts. The depth should be about one-third of the total post height for stability (e.g., 60 cm deep for a 180 cm post).
• Mix concrete according to the manufacturer’s instructions.
3. Setting the Posts:
• Place the posts in the holes, ensuring they are plumb (vertically straight) using a level.
• Pour concrete into the holes around the posts, filling to ground level.
• Allow the concrete to set and cure according to the manufacturer’s instructions, typically 24-48 hours.
4. Assembling the Frame:
• Cut the wooden beams to the required lengths for cross beams and rafters.
• Drill pilot holes to prevent splitting and secure the cross beams to the posts using screws or bolts.
• Attach additional rafters or crosspieces to create the desired structure, ensuring they are level and evenly spaced.
Example for a Simple Pergola:
• Secure two cross beams across the top of each pair of posts.
• Attach additional rafters perpendicular to the cross beams, spaced about 30-60 cm apart.
Example for a Trellis:
• Attach horizontal and vertical beams to create a grid pattern, ensuring adequate space for plants to climb.
5. Planting Climbing Plants:
• Select climbing plants suitable for your climate and the amount of sunlight the structure receives.
• Dig small holes at the base of the posts or along the trellis.
• Plant the climbing plants, ensuring their roots are covered with soil and water thoroughly.
• Train the plants to grow up and around the structure by gently tying them to the beams as they grow.
Maintenance Tips:
• Regular Inspection: Check the structure periodically for any loose screws or damage. Tighten screws and make repairs as needed.
• Cleaning: Clean the wooden beams annually to remove dirt and prevent mould or mildew.
• Plant Care: Prune and trim the climbing plants regularly to encourage healthy growth and maintain the desired shape.
By following these detailed steps, you can build a beautiful and functional pergola or trellis that enhances your garden and provides support for climbing plants.
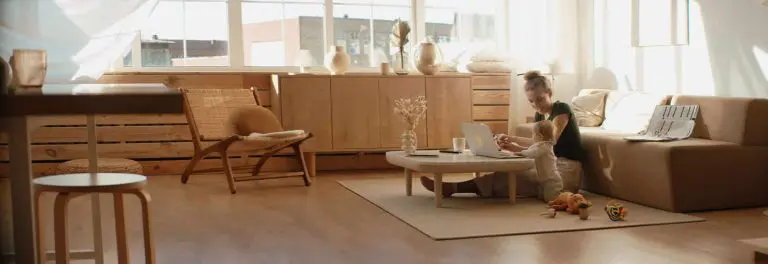
9. Home Office Upgrade
Why Upgrade Your Home Office?
Upgrading your home office offers several benefits:
• Increased Productivity: A well-organised and comfortable workspace can help you stay focused and efficient.
• Enhanced Comfort: Ergonomic furniture and better lighting can reduce physical strain and improve overall comfort.
• Personalisation: Customising your office to suit your tastes and needs can make it a more enjoyable place to work.
• Improved Organisation: Better storage and organisation can reduce clutter and make it easier to find what you need.
How to Upgrade Your Home Office:
Materials Needed:
• Shelving materials (wood, brackets, screws)
• Desk supplies (new desk or standing desk converter)
• Lighting fixtures (task lamps, overhead lights)
• Organisational tools (trays, organisers, bulletin boards)
• Drill
• Screws
• Measuring tape
• Saw (if cutting shelves)
• Level
• Sandpaper
• Paint or stain (optional, for custom shelves or desk)
Steps:
1. Build Custom Shelves:
• Planning and Measuring:
• Decide on the size and location of the shelves. Measure the available wall space and determine the dimensions.
• Sketch a design that includes the number of shelves and their spacing.
• Cutting and Preparing Materials:
• Cut the wooden planks to the desired lengths for each shelf.
• Sand the edges and surfaces to remove splinters and rough spots.
• Paint or stain the shelves if desired, allowing them to dry completely.
• Installing the Shelves:
• Mark the positions for the brackets on the wall, ensuring they are level and evenly spaced.
• Drill pilot holes and attach the brackets using screws.
• Place the shelves on the brackets and secure them with screws if necessary.
• Using the Shelves:
• Arrange books, files, and decor items on the shelves to keep your workspace organised and visually appealing.
2. Construct a New Desk or Add a Standing Desk Converter:
• Building a New Desk:
• Measure the space where the desk will be placed and sketch a design.
• Cut the wooden planks to size for the desk top and legs.
• Sand and finish the pieces as desired.
• Assemble the desk by attaching the legs to the desk top using screws and a drill.
• Adding a Standing Desk Converter:
• Purchase a standing desk converter that fits your existing desk.
• Follow the manufacturer’s instructions to set up and secure the converter.
• Adjust the height to a comfortable level for standing work.
3. Improve Lighting:
• Choosing Lighting Fixtures:
• Select task lamps for focused lighting on your desk and overhead lights for general illumination.
• Consider adjustable lamps to direct light where it’s needed most.
• Installing Lighting:
• Position task lamps on your desk or clamp them to the edge for flexibility.
• Install overhead lights, ensuring they are properly wired and positioned to reduce glare on screens.
• Enhancing Natural Light:
• If possible, position your desk near a window to take advantage of natural light.
• Use light-filtering blinds or curtains to reduce glare while maintaining brightness.
4. Organise Your Space:
• Using Trays and Organisers:
• Place trays on your desk to sort papers and supplies.
• Use organisers for pens, pencils, and other small items to keep your workspace tidy.
• Adding Bulletin Boards:
• Install a bulletin board on the wall to pin important notes, calendars, and to-do lists.
• Use push pins or clips to attach items for easy access and visibility.
• Maintaining Organisation:
• Regularly declutter your desk and shelves to keep the space neat.
• Develop a filing system for papers and digital documents to stay organised.
By following these detailed steps, you can upgrade your home office to create a more productive, comfortable, and personalised workspace that meets your needs.
10. Outdoor Lighting
Why Install Outdoor Lighting?
Outdoor lighting offers several benefits:
• Extended Usability: It allows you to use your garden or outdoor spaces well into the evening.
• Welcoming Atmosphere: Proper lighting creates a warm and inviting environment for guests.
• Safety and Security: Illuminating pathways and entry points reduces the risk of accidents and deters potential intruders.
• Aesthetic Appeal: Lighting can highlight focal points and create a magical ambiance in your garden.

How to Install Outdoor Lighting:
Materials Needed:
• Solar-powered lights
• Lanterns
• String lights
• Extension cords (if needed)
• Hooks or clips (for hanging lights)
• Stakes (for solar lights)
• Measuring tape
• Ladder (if needed for hanging lights)
Steps:
1. Plan Your Lighting Design:
• Walk around your garden at dusk to determine where lighting is needed most.
• Focus on key areas such as pathways, seating areas, entry points, and garden features.
• Sketch a layout of your garden, marking where each type of light will be placed.
• Consider the power sources for your lights, ensuring that solar-powered lights receive adequate sunlight during the day.
2. Install Solar-Powered Lights:
• Pathways and Garden Beds:
• Choose solar-powered lights designed for outdoor use, with stakes for easy installation.
• Measure the spacing between each light, typically 1-2 meters apart for pathways.
• Insert the stakes into the ground along the edges of pathways or in garden beds, ensuring the solar panels are positioned to receive direct sunlight.
• Test the lights to ensure they activate at dusk.
3. Hang String Lights:
• Patios, Pergolas, or Trees:
• Measure the area where you plan to hang the string lights to determine the length needed.
• Use hooks or clips to secure the lights. For pergolas or patios, attach hooks to the beams or edges.
• For trees, wrap the lights around branches or trunks, securing them with gentle clips or ties.
• Connect the string lights to an outdoor-rated extension cord if needed, and plug them into a weatherproof outdoor outlet.
• Test the lights to ensure they illuminate evenly and create the desired effect.
4. Place Lanterns:
• Tables and Hanging Locations:
• Choose lanterns suitable for outdoor use, either battery-operated or solar-powered.
• Place lanterns on tables to create ambient lighting for dining or relaxation areas.
• Hang lanterns from hooks, tree branches, or pergolas to add height and visual interest.
• Ensure lanterns are positioned securely and do not pose a fire hazard.
Additional Tips:
• Consider Motion Sensors: For added security, install motion-sensor lights near entry points and along pathways.
• Energy Efficiency: Use LED bulbs for their energy efficiency and long lifespan.
• Weatherproofing: Ensure all lighting fixtures and cords are rated for outdoor use and are weather-resistant.
• Regular Maintenance: Periodically check and clean the lights to ensure they are free of dirt and debris that could block the light or solar panels.
By following these detailed steps, you can install outdoor lighting that enhances the functionality and aesthetic appeal of your garden, creating a beautiful and safe outdoor environment.
Feeling bored?
Each of these projects offers a satisfying and productive way to spend your time while enhancing your home and garden. Happy DIY-ing!
![Gardening For Beginners [Top 10 Tips]](https://www.maxwellsdiy.co.uk/wp-content/smush-webp/2024/04/top_10_tips_for_gardening_beginners-768x512.jpg.webp)